Pick-up cartridges are crucial devices in vinyl-based hi-fi systems. They are the device that tracks the record groove, picking up all the musical information. Without a good hi-fi cartridge, you can't get the full musical experience. However, even a good cartridge can sound terrible when not installed correctly. So here we'll run you through the full set-up process when installing a new or replacement hi-fi cartridge. With many turntables some of these adjustments may not be necessary or possible; but the more you can do to make things perfect, the more you will hear the difference.
Please Note: Pick-up cartridges are extremely delicate micro-mechanical devices. Absolute care and attention should be given when installing a cartridge, as any mistreatment or accidents may result in irreparable damage. Please Contact Us or get in touch with your local retailer if you have any concerns.

Most turntables and headshells (including all current Pro-Ject models) accept all cartridges which have a 0.5 inch (1.27 cm) spacing between the mounting holes. The mounting of a cartridge is done using the screws and nuts it comes provided with. The cartridge is mounted to the arm by passing each screw through the slot in the headshell assembly and loosely securing it into place.
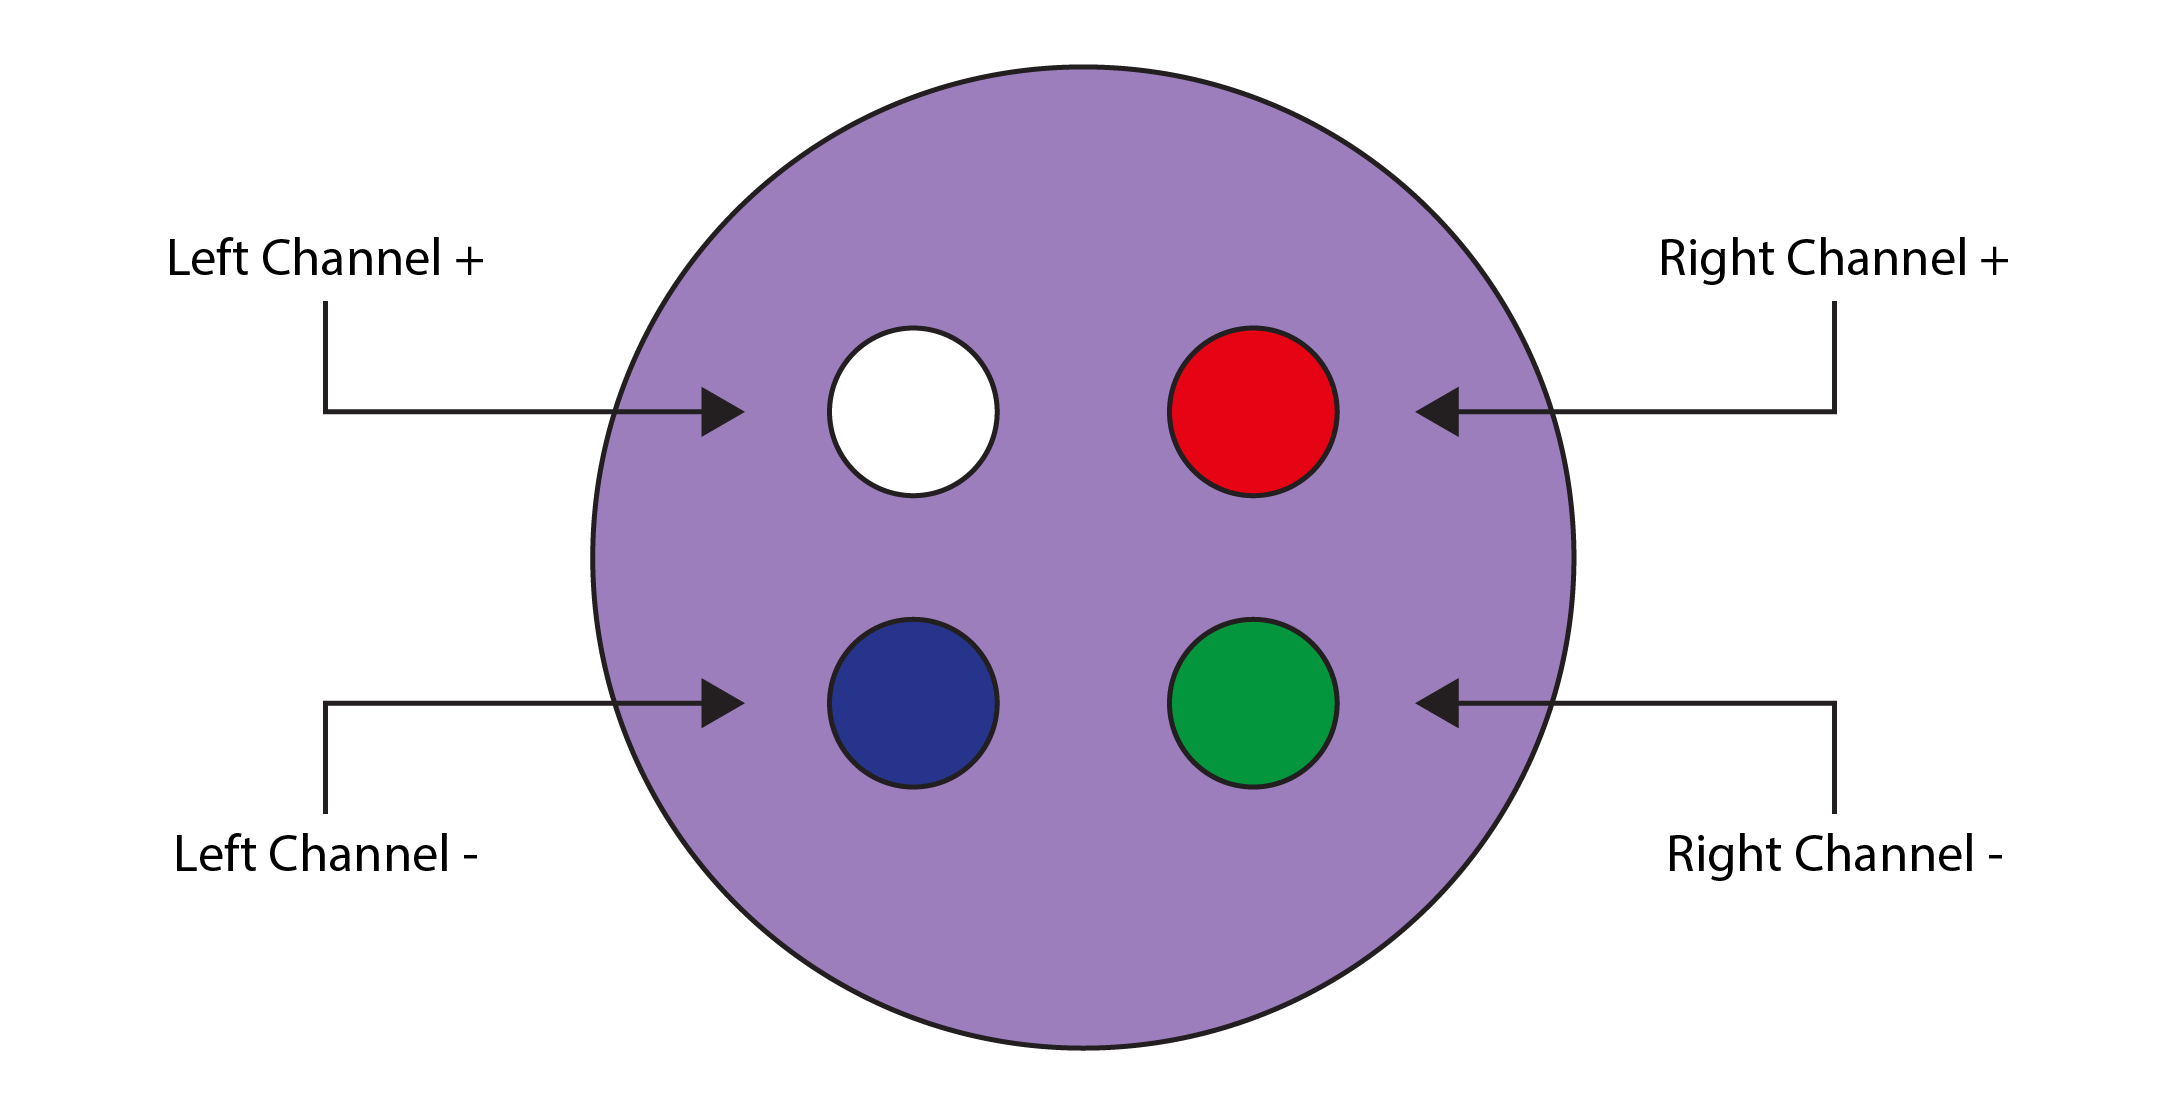
The next step is to fit the four coloured wires to the pins on the cartridge as shown. The cartridge will normally have its pins colour-coded the same as the wires, but in other cases use the following code:
White Pin = left channel positive [L+]
Red Pin = right channel positive [R+]
Green Pin = right channel return [R-]
Blue Pin = left channel return [L-]
When a recording is cut into a lacquer disc (from which the master pressing is made), the disc rotates and the cutter head moves laterally from the outside of the lacquer to the inside. The cutter diamond is mounted in a parallel tracking arm that moves across the record so that the cutter is held at a constant 90° angle with the groove. An ideal playback system would therefore work in a similar way – keeping a cartridge at a constant 90° angle throughout a recording. However, most record players are actually fitted with radial arms which pivot from one corner of the turntable so that the playback stylus moves across the record along a fixed radius. The stylus, as a result, cannot follow the exact path made by the cutter because the lateral angle varies depending upon the position across the record surface.
In fact, what happens is that because the stylus is not exactly in line with the groove but at an angle to it, the stylus is touching one groove wall a tiny distance ahead of where it is touching the other groove wall. This 'tracking error' means that there will be a time difference between the signals of the left and right channels. What is needed is a way of aligning the arm and cartridge in such a way that this time difference is minimised to an inaudible level at every point on the track from the start to the finish of a record.
Of course, one easy way of avoiding this problem would be to use a much longer tonearm, as a longer arm reduces the tracking error over the course of a whole record. This is why longer 10” and 12” tonearms are very popular with analogue audiophiles. However, this is not always practical. So the way we correctly align any arm is by using a protractor to help align the cartridge at two ends of a record.
In aligning the arm and cartridge there are three main specifications which should be considered. These are the effective tone-arm length (the distance between the arm pivot and diamond tip), the overhang (the distance between the diamond tip and the centre of the spindle) and the offset angle of the (head-shell relative to the arm tube).
The mathematics of how the stylus traverses the record disc is quite complex, but in practice, the task of alignment is made very simple by the use of an alignment protractor which can be as simple as a piece of printed card or plastic which slots through the spindle and sits on the turntable platter or more advanced like the Pro-Ject Align it products. This protractor has a number of lines radiating out from the spindle and labelled from 0 to 5 degrees plus a series of vertical parallel lines. These reference points are usually positioned at distances of 63 mm and 125 mm from the spindle. This alignment is a good compromise across the whole of the record and ensures that almost zero distortion is achieved.
The error is reduced by turning the cartridge in the headshell by slightly loosening the mounting bolts in the slotted holes, lifting the tonearm and tweaking the position of the cartridge before lowering back onto the protractor to check. This adjustment should result in the cantilever being moved into a position where it is (as near as possible) parallel with the lines running across the protractor in both the inner and outer positions on the protractor. These adjustments give some flexibility in the mounting position to ensure the best alignment allowing the stylus to track the record groove accurately. However, there will always be a slight error and different designers approach this problem in different ways with some noting that the highest level of distortion will be in the inner grooves near the label and so they align for the best accuracy in that region.
This is the stage where you apply the correct downforce and anti-skate setting to a cartridge, so it reads the most information possible from the record wall without causing damage to the cartridge or the record. For a detailed user manual focused on Pro-Ject turntables, visit our Turntable Support section or watch the video opposite.
Please Note: Processes for other manufacturers’ turntables may vary.
These are the core steps for installing a cartridge on a turntable. However, if your tonearm is able to support extra adjustments, follow the extra steps below...
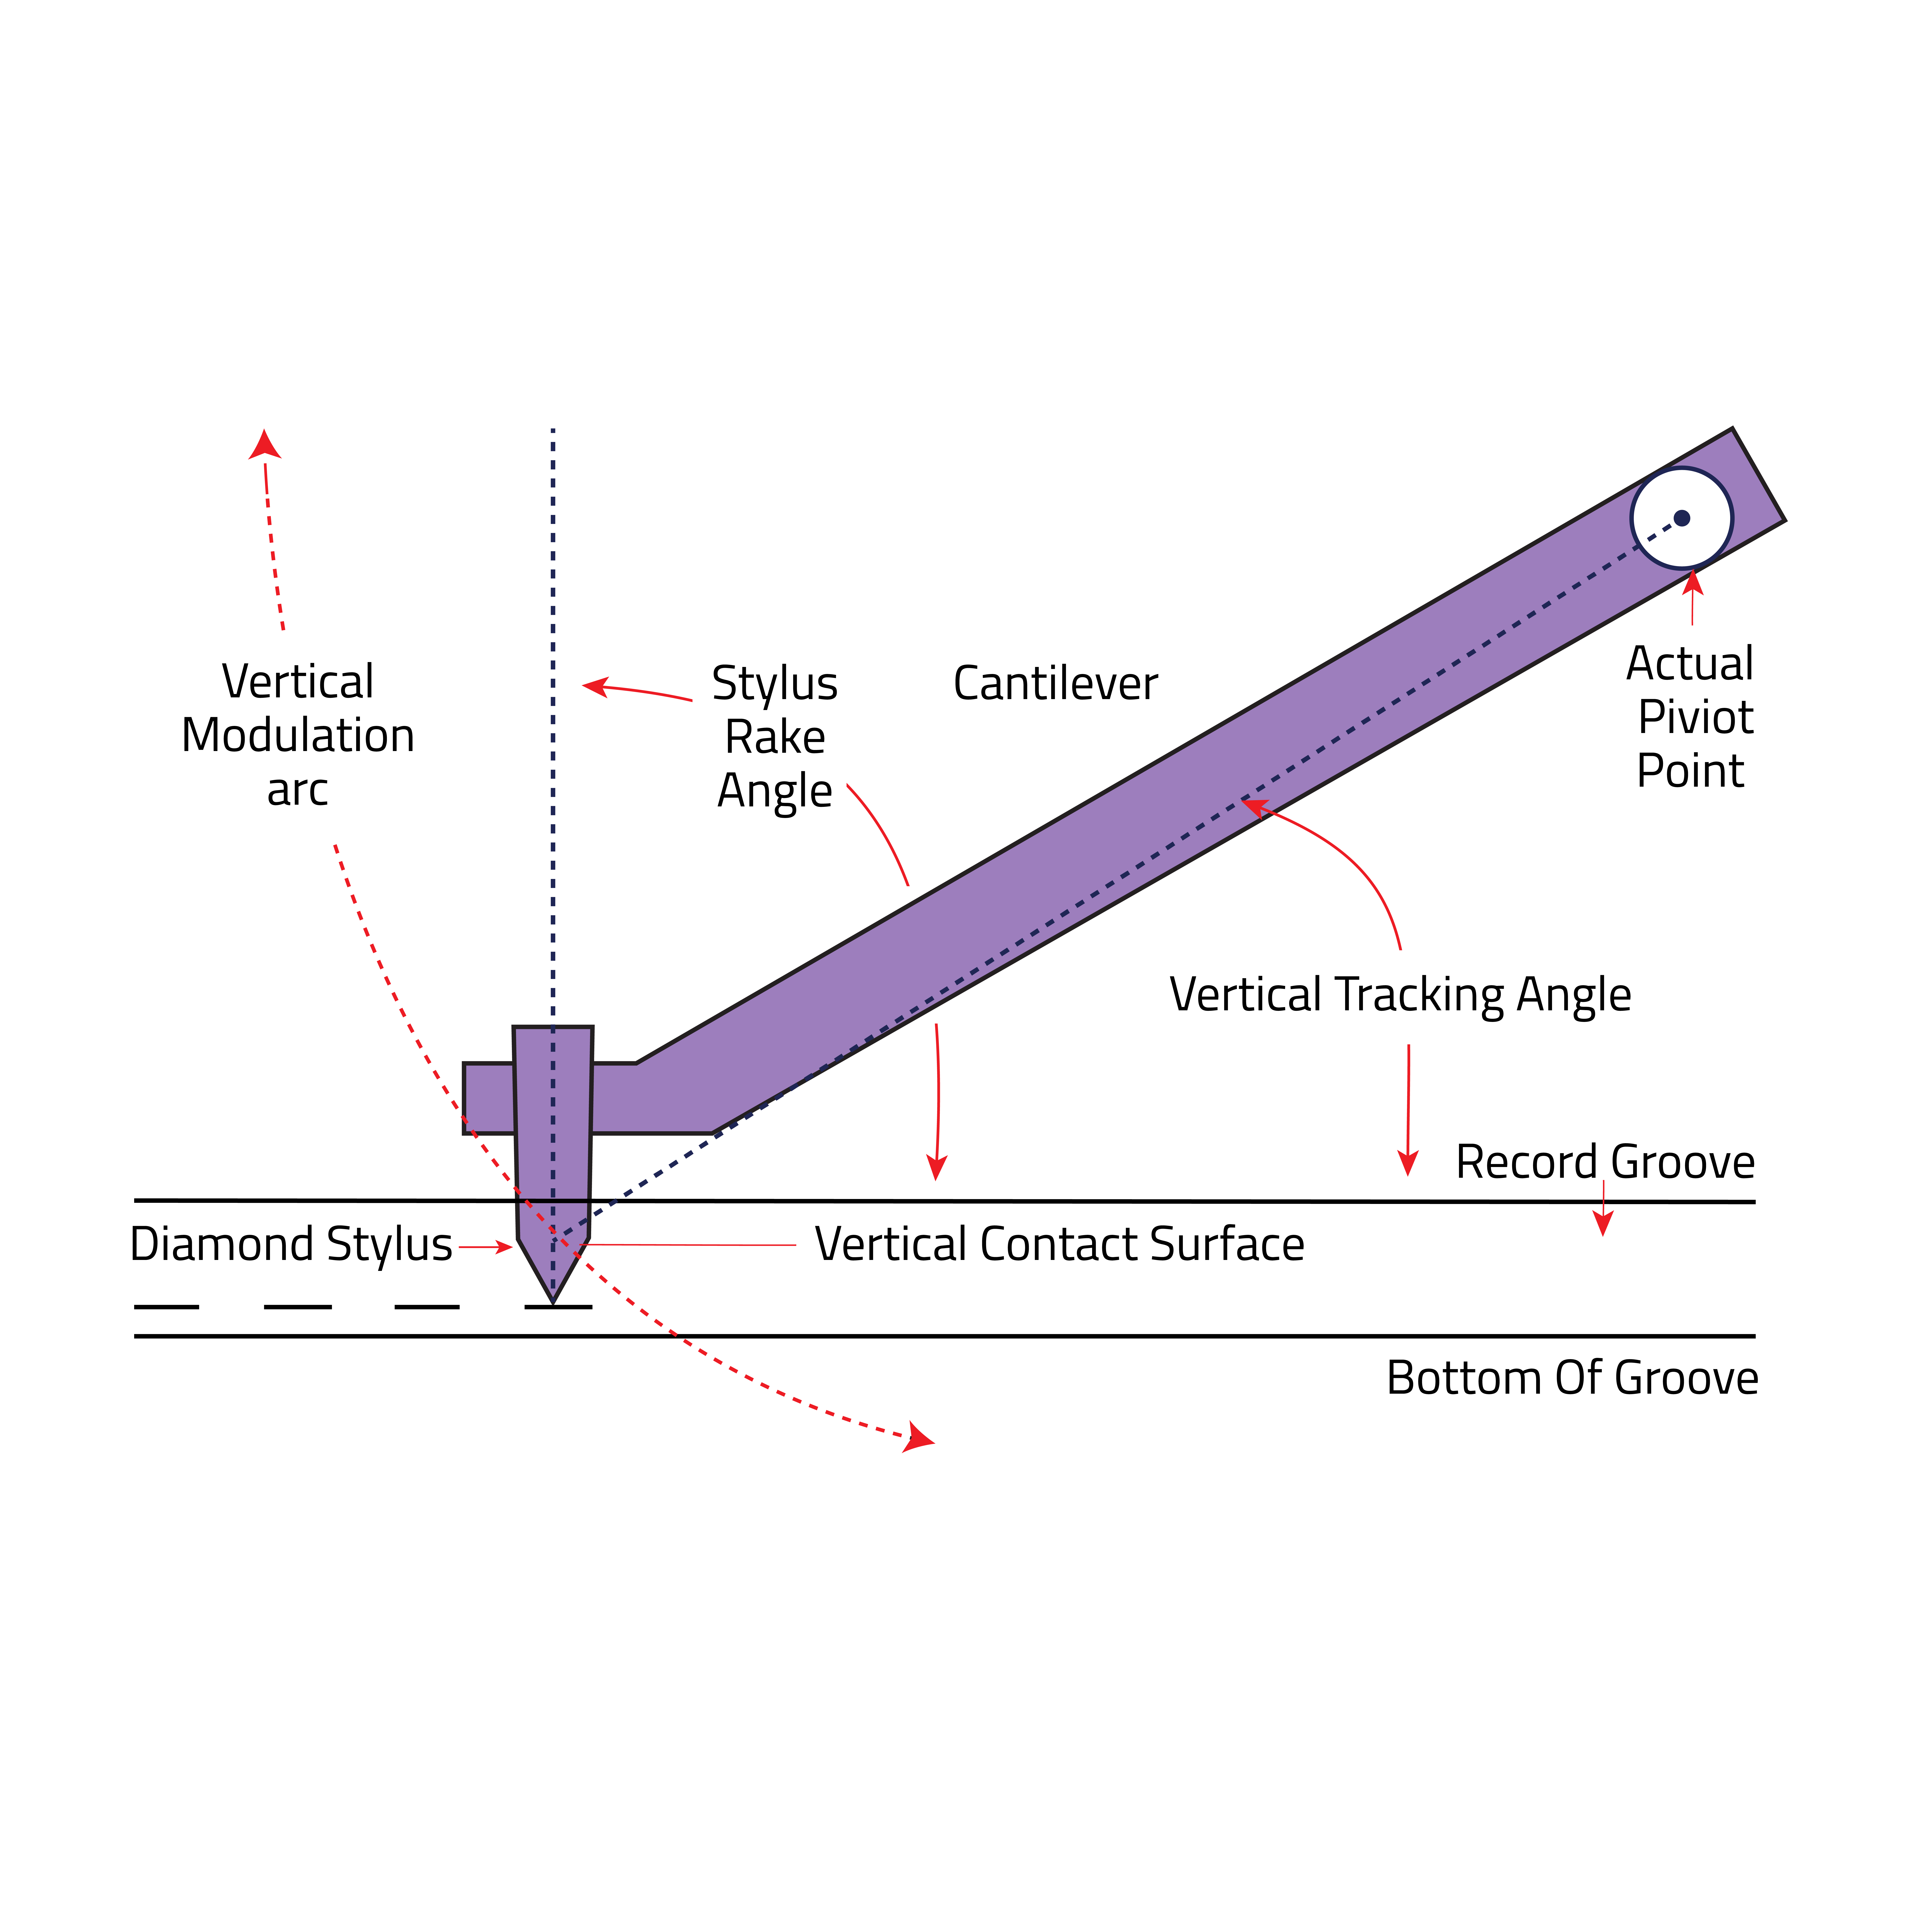
When an original record master is cut, the cutter sits at a slight angle to the record surface because the cutter head needs to be lifted slightly above the record surface. This angle is called the Vertical Tracking Angle (VTA) and can vary from record to record. In the 1960s most records were cut with a VTA of 15 degrees, but by the 1980s the standard became 20 degrees. Yet even though we have these ‘standards’, many successful cutting engineers still make their own choice of VTA in order to give the sound a particular character, which is their trademark.
If you have a Pro-Ject record player which has been provided with a fitted tonearm and pickup cartridge then the correct VTA will have been set by the factory and no further adjustment is needed. However if you have an alternative model, or if the tonearm and/or cartridge have been recently changed, then the VTA will need to be set and this is typically done in two steps.
The first simple step is to check whether the arm and the headshell are parallel to the record. Most manufacturers of cartridges mount the stylus cantilever so that a Vertical Tracking Angle of about 20 degrees is achieved when the arm is parallel to the record. If the arm is not parallel to the record, you should adjust the height of your tonearm until it is (how to do this exactly depends on your tonearm – please consult your user manual for advice or our Turntable Support Section).

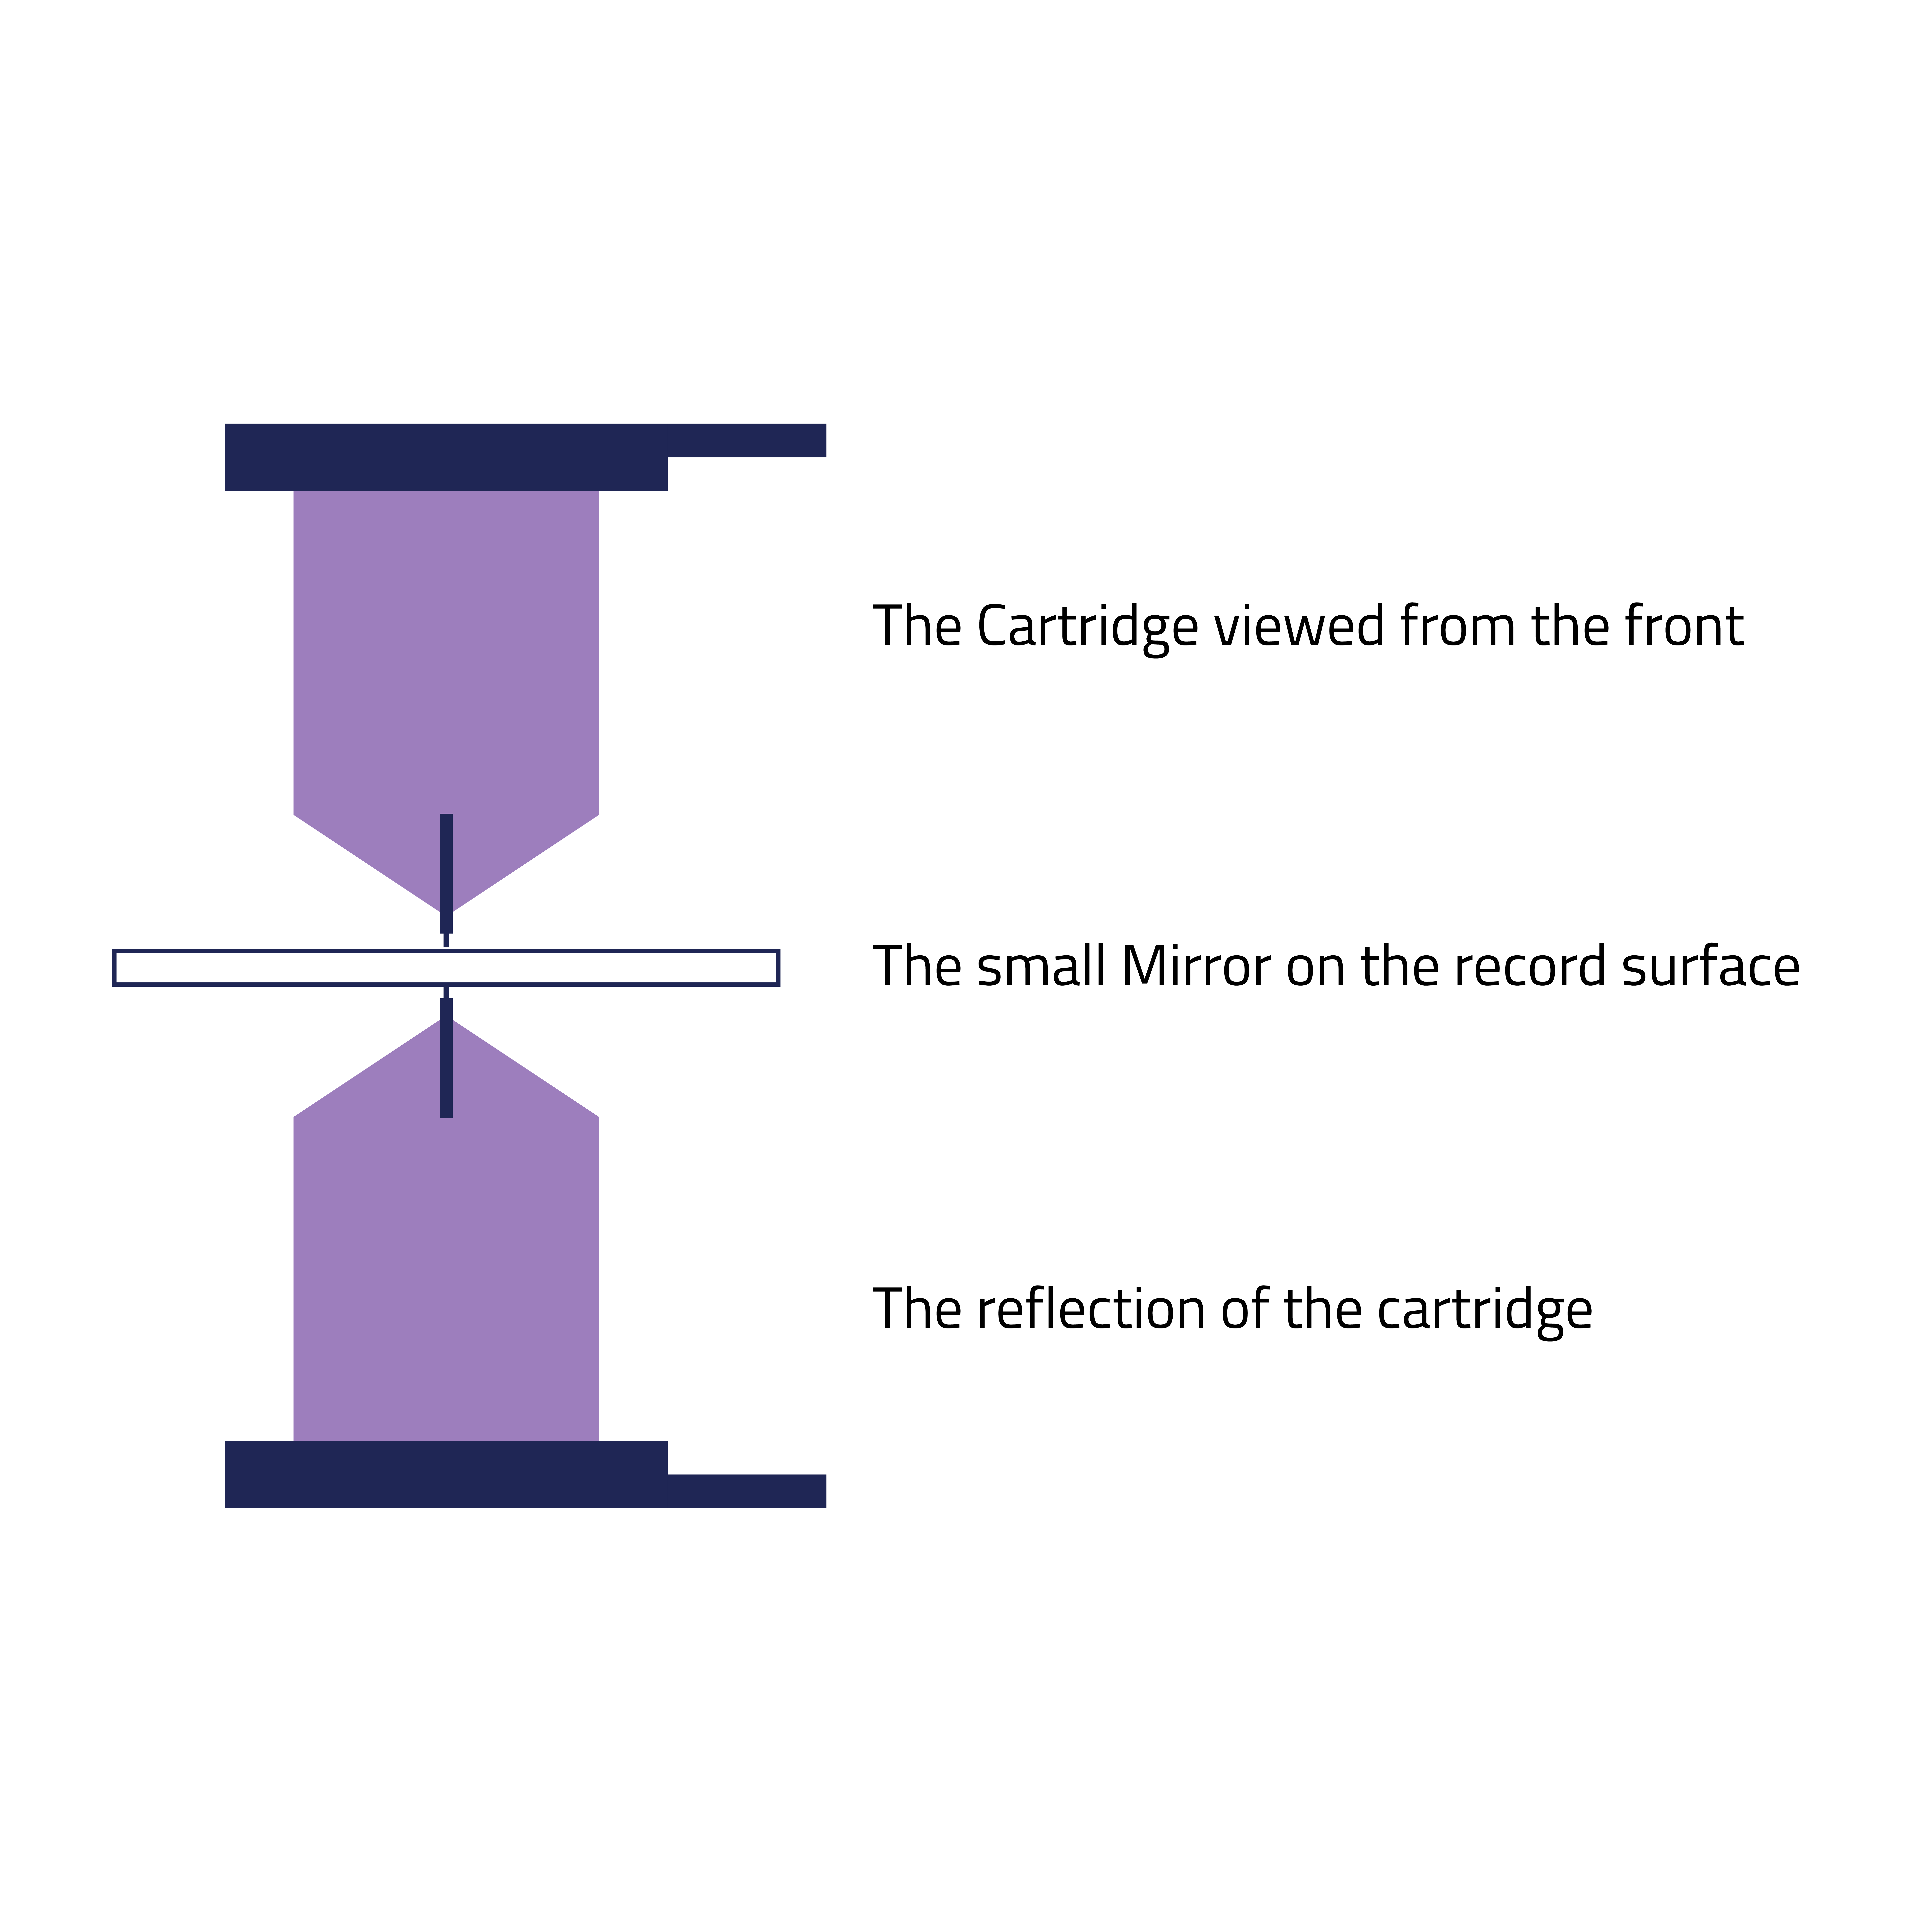
When the arm is level, the next step is to adjust the azimuth. Because the music is pressed into the two walls of a ‘V’-shaped record groove, it is essential that the stylus of the pick-up cartridge sits perfectly vertical within the groove, rather than leaning into one or other of the groove walls. This adjustment is called the Azimuth Adjustment and it can be checked in a fairly simple way...
Take a small, thin mirror (some manufacturers sell mirror-plated alignment gauges) and place it on the record platter. Put the cartridge onto the mirror’s surface and rotate it by loosening off the small adjustment screw at the bearing end of a tonearm (on Pro-Ject tonearms) or inside the headshell connector (where available). When the alignment is correct, the cartridge and its reflection will be perfectly in line with each other (as shown to the right).
Please Note: Never adjust the arm tube whilst the stylus tip is in the record groove or in contact with a mirror! You will cause damage to the cantilever. The arm must always be lifted to make the adjustment and then lowered again to re-check the azimuth alignment.

Now that you've made some additional adjustments, it's worth re-applying the tracking force and anti-skate, to account for any subtle changes that may have taken place.
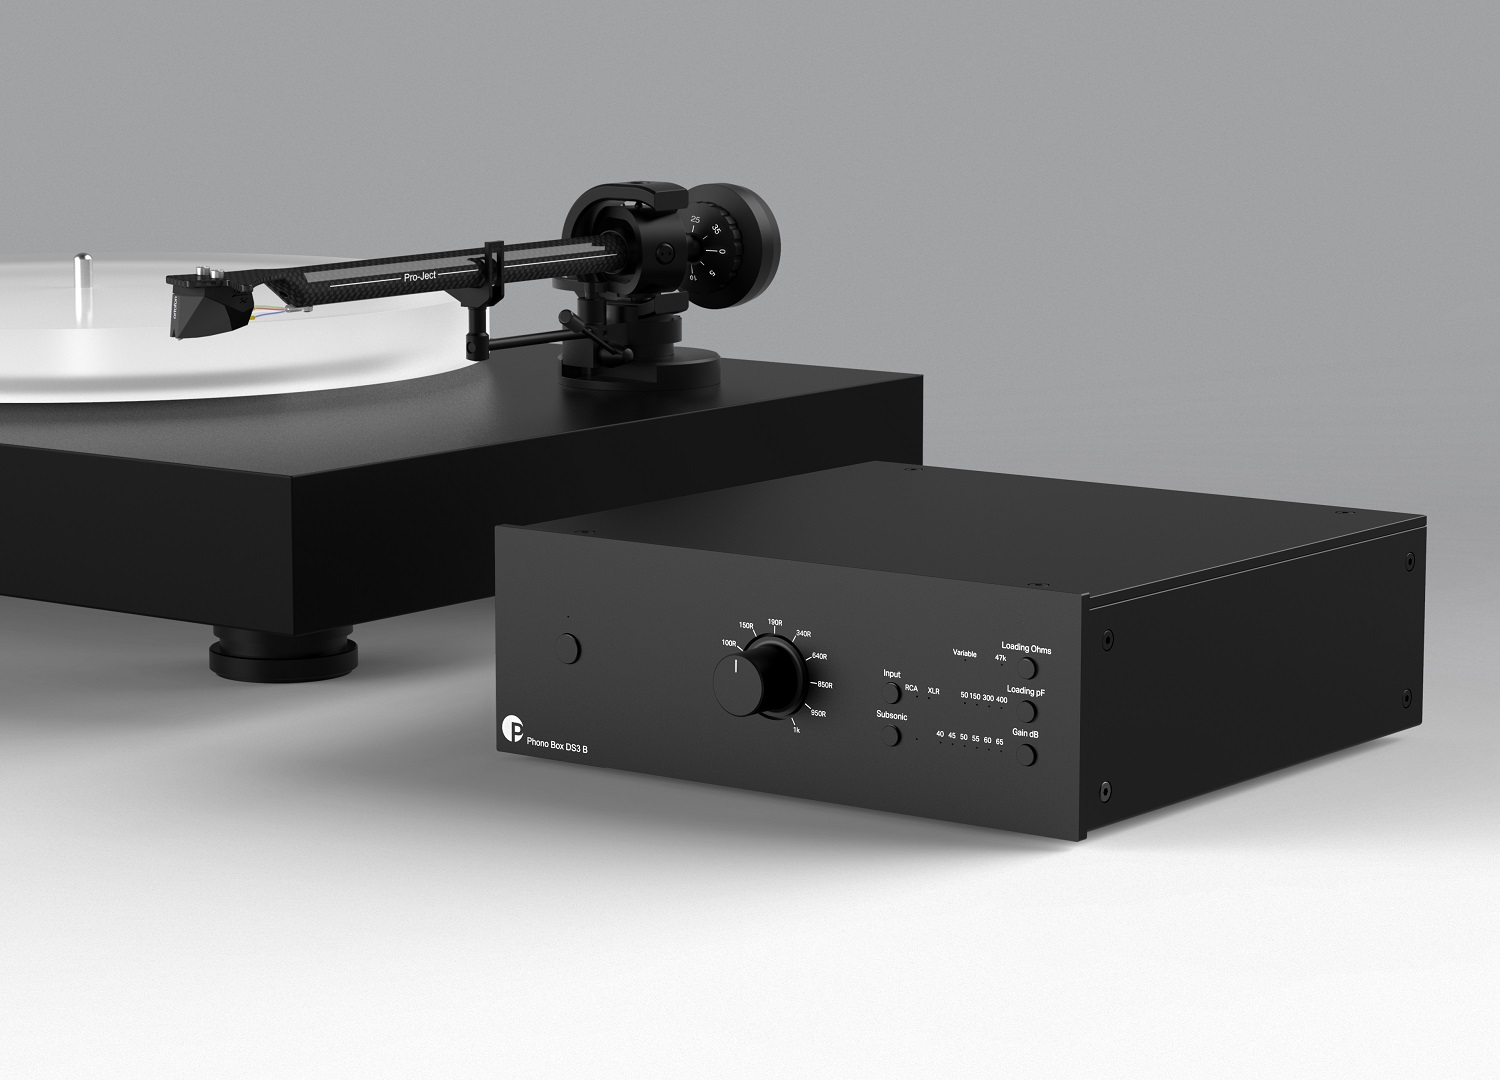
The phono stage, or phono pre-amplifier, is an often over-looked yet highly critical stage in a vinyl hi-fi system. It is the first point at which the pick-up cartridge's signal is amplified (unless you are also using a Step-Up Transfomer). Many phono stages have a variety of settings available, which allow them to work more accurately with the installed Moving Magnet or Moving Coil cartridge. For more information on how to set-up a phono stage, or visit our dedicated Phono Stages Explained page.

Leif Johannsen, Chief Acoustics and Development at Ortofon, has produced some more detailed videos to help with advanced cartridge set-up. Check them out below...